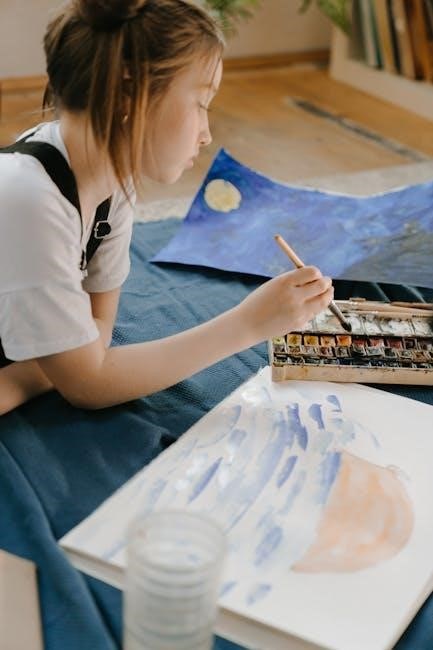
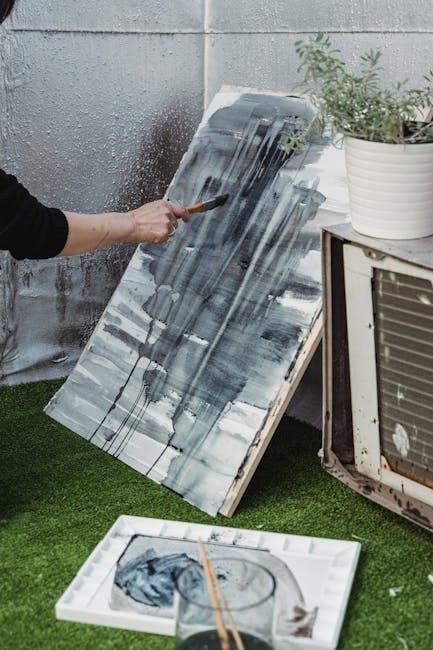
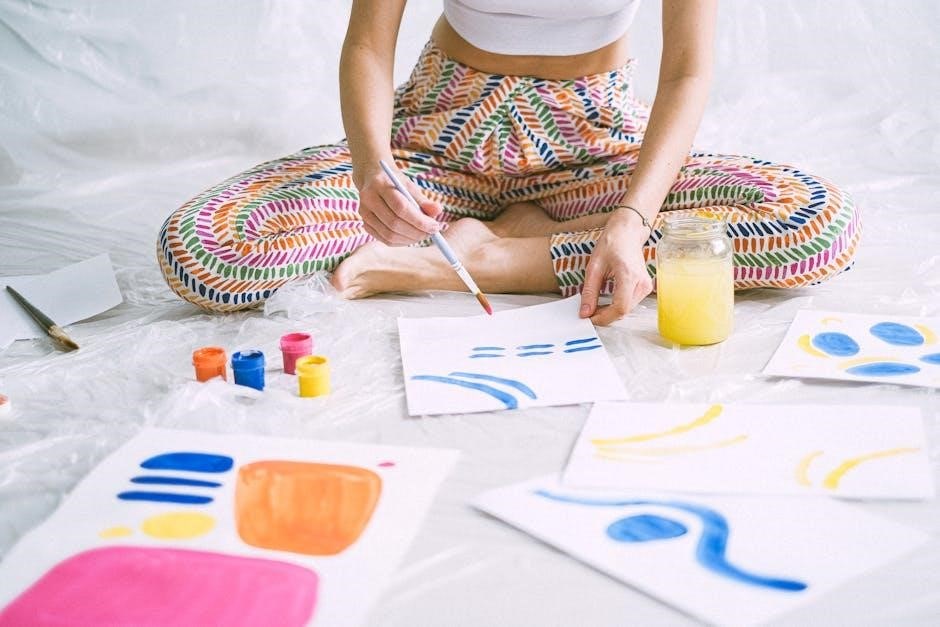
Watercolour, a captivating medium, offers unique expressive possibilities for artists of all levels, demanding understanding of its characteristics.
Exploring watercolor techniques, from basic washes to complex layering, unlocks creative potential, as demonstrated in various tutorials and guides.
Many online forums discuss watercolor tips, materials, and challenges, fostering a vibrant learning community for aspiring artists seeking improvement.
Mastering watercolor involves embracing imperfection, as Audacity allows artists to feel comfortable with their work, even if it’s not flawless.
What is Watercolour?
Watercolour, at its core, is a painting medium utilizing pigments suspended in a water-based solution; Unlike oils or acrylics, it’s renowned for its transparency and luminosity, creating delicate washes and vibrant glazes.
The essence of watercolour lies in its interaction with the paper; the white of the paper shines through the translucent layers, contributing to the artwork’s brightness. This characteristic distinguishes it from opaque mediums.
Historically, watercolour has been employed for botanical illustrations, landscapes, and sketches, valued for its portability and quick-drying nature. Modern artists continue to explore its versatility, pushing boundaries with innovative techniques.
Understanding watercolour isn’t simply about applying paint; it’s about controlling water, embracing its unpredictable flow, and appreciating the interplay between pigment and paper. Numerous tutorials and guides delve into these nuances, offering insights for beginners and experienced artists alike. The medium encourages a fluid and expressive approach, fostering creativity and experimentation.
The Unique Characteristics of Watercolour Paint
Watercolour paints possess several defining characteristics that set them apart. Their transparency allows for layering, building depth and complexity through successive washes – a technique known as glazing.
Unlike opaque paints, watercolour relies on reflected light from the paper, creating a luminous quality. This means the paper’s texture and colour significantly influence the final result.
Watercolour is also known for its fluidity and unpredictable nature. The way the paint flows and blends on the paper can be both challenging and rewarding, demanding a degree of control and acceptance of serendipity.
Pigment quality impacts lightfastness – a crucial factor for archival durability. Discussions within online forums often address this, alongside colour mixing and techniques. Mastering watercolour involves understanding these nuances, as highlighted in various tutorials, and embracing the medium’s inherent responsiveness. It’s a dance between control and chance, resulting in uniquely expressive artwork.
Essential Watercolour Materials
Watercolour painting requires specific tools: paints (tubes or pans), paper suited for washes, and a variety of brushes for diverse techniques.
Selecting quality materials enhances the painting experience and ensures archival durability, as discussed in online tutorials.
Watercolour Paints: Tubes vs. Pans
Watercolour paints come in two primary forms: tubes and pans, each offering distinct advantages for artists exploring various techniques. Tube colours are highly concentrated, allowing for vibrant, intense washes and easier mixing of large quantities of paint – ideal for expansive backgrounds or bold statements.
Pans, conversely, are pre-dried blocks of colour, conveniently housed in palettes. They are exceptionally portable, making them perfect for plein air painting or travel. While generally less intense than tube colours initially, pans offer greater control for detail work and layering, as artists can pick up precise amounts of pigment.
The choice often depends on personal preference and painting style. Beginners might find pans more manageable, while experienced artists frequently utilize both formats, leveraging the strengths of each. Online forums frequently discuss the nuances, offering valuable insights into selecting the best option for individual needs and watercolor tips.
Paper for Watercolour: Choosing the Right Surface
Watercolour paper is crucial for successful painting, significantly impacting how paint flows, blends, and adheres. The weight, measured in pounds (lbs) or grams per square meter (gsm), determines paper durability. Heavier weights (140lb/300gsm or higher) resist buckling when wet, essential for washes and multiple layers – preventing frustrating distortions.
Surface texture also plays a vital role. “Hot press” paper is smooth, ideal for detailed work and fine lines, but less forgiving. “Cold press” offers a textured surface, excellent for general watercolor techniques and creating interesting effects. “Rough” paper has the most texture, perfect for expressive, granular washes.
Paper composition matters too; 100% cotton paper is archival quality, resisting yellowing and degradation over time. Cellulose papers are more affordable but less durable. Considering these factors ensures your chosen surface complements your artistic vision and supports your chosen watercolor tips and style.
Brushes for Watercolour: Types and Uses
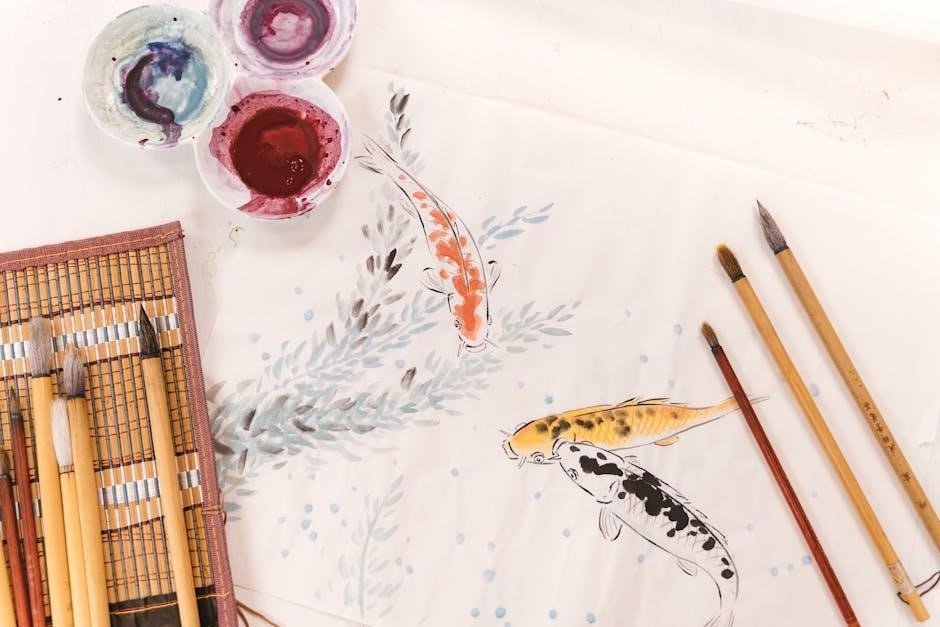
Watercolour brushes dramatically influence the outcome of your paintings. They are categorized by hair type: sable (expensive, excellent water holding capacity), synthetic (affordable, versatile), and natural hair (like squirrel, offering softness). Brush shapes also dictate effects – rounds are ideal for detail and washes, flats for broad strokes and washes, and rigger brushes for fine lines.
Understanding brush size is key; larger brushes cover areas quickly, while smaller brushes offer precision. Experimenting with different brushes unlocks diverse watercolor techniques. A size 12 round is a good all-rounder, while a size 0 round excels in detail work.
Proper brush care extends their lifespan. Clean brushes thoroughly after each use, reshaping the bristles before storing them. Learning to utilize various brushes, alongside helpful watercolor tips, will elevate your painting skills.
Basic Watercolour Techniques
Watercolour techniques encompass wet-on-wet, wet-on-dry, dry brush, lifting colour, and layering—foundational skills for artists.
Mastering these techniques, through tutorials, unlocks expressive potential and allows for diverse artistic exploration.
Practice these core methods to build confidence and refine your painting style, enhancing your artistic journey.
Wet-on-Wet Technique
Wet-on-wet is a fundamental watercolour technique where paint is applied to already dampened paper. This creates soft, diffused edges and allows colours to blend seamlessly, resulting in atmospheric effects and fluid transitions.
To execute this, thoroughly wet the paper with clean water, ensuring an even sheen. Then, gently apply your chosen watercolour paints. The wet surface encourages the pigments to spread and mingle organically, fostering unpredictable and beautiful results.
Controlling the amount of water on both the brush and the paper is crucial. More water leads to greater diffusion, while less water offers more control. This technique is ideal for skies, backgrounds, and creating soft, dreamy landscapes.
Experiment with dropping different colours onto the wet surface to observe how they interact. Remember, the paper does the work, allowing for a spontaneous and expressive style. Mastering wet-on-wet opens doors to a wide range of artistic possibilities, as highlighted in many watercolour tutorials.
Wet-on-Dry Technique
The wet-on-dry technique, conversely, involves applying wet paint to dry paper. This method yields sharp, defined edges and greater control over pigment placement, making it ideal for detailed work and precise shapes.
Unlike the fluid blending of wet-on-wet, wet-on-dry allows for layering colours without significant mixing on the paper. This is particularly useful for building up depth and creating distinct forms. The paint remains contained, offering a higher degree of accuracy.
Begin with a completely dry surface and load your brush with watercolour paint. Apply the paint directly to the paper, observing how the edges remain crisp and clean. This technique is excellent for rendering textures, details, and creating strong contrasts.
Many watercolour tutorials emphasize the importance of brush control in wet-on-dry. Practice varying pressure and brushstrokes to achieve different effects. It’s a foundational skill for artists seeking precision and clarity in their watercolour paintings.
Dry Brush Technique
The dry brush technique is a versatile method for creating textured effects in watercolour painting. It involves using a brush with very little water, dragging it across the paper’s surface. This results in a broken, granular appearance, perfect for depicting rough textures like wood, stone, or foliage.
To achieve this, load your brush with paint, then blot most of it off onto a paper towel. The brush should feel almost dry. Gently drag the brush across the paper, allowing the texture of the paper to show through. Varying pressure and brush angle will create different effects.
This technique excels at suggesting detail without fully rendering it, adding visual interest and depth. It’s often used to create highlights or to depict weathered surfaces. Many watercolour tips suggest practicing on scrap paper to master the brush control needed.
Exploring watercolour tutorials will reveal how artists combine dry brush with other techniques for stunning results. It’s a powerful tool for adding realism and character to your paintings.
Lifting Colour
Lifting colour in watercolour is a technique used to remove paint from the paper, creating highlights, correcting mistakes, or softening edges. It’s a crucial skill for achieving nuanced effects and controlling the flow of paint.
This can be done while the paint is still wet, using a clean, damp brush or a paper towel. Gently blot or lift the colour, being careful not to scrub the paper. For dried paint, re-wet the area and then attempt lifting. The success depends on the paper’s texture and the paint’s pigment.
Different brushes and materials yield varying results. A soft brush is ideal for subtle lifting, while a textured paper allows for more dramatic removal. Many watercolour tutorials demonstrate this process, emphasizing gentle application.
Mastering this technique requires practice and understanding how different paints react. It’s a valuable tool for adding luminosity and correcting errors, as discussed in many watercolour tips forums.
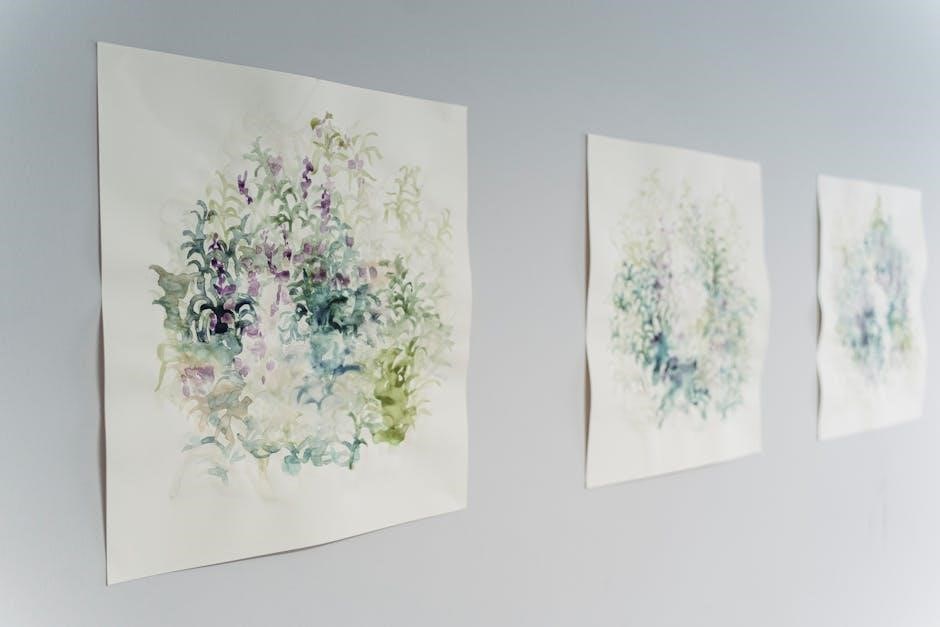
Layering and Glazing
Layering and glazing are fundamental watercolour techniques, building depth and richness through successive washes of diluted paint. Layering involves applying one colour over another while still wet, creating blended effects. Glazing, however, applies transparent washes over completely dry layers.
This process allows for subtle colour mixing and the creation of complex hues. Each glaze modifies the layers beneath, influencing the final result. Patience is key, as multiple thin layers are preferable to a single thick one, preventing muddiness.
Many watercolour tutorials emphasize the importance of allowing each layer to dry fully before applying the next. This prevents unwanted blending and maintains colour clarity. Understanding pigment transparency is crucial for effective glazing.
Exploring these techniques, as discussed in various watercolour tips forums, unlocks a wide range of expressive possibilities, adding luminosity and dimension to your paintings.
Colour Theory in Watercolour
Colour theory is vital for watercolour success, encompassing hue, value, and intensity—characteristics crucial for harmonious paintings.
Mastering colour mixing basics, and building a personalized watercolour palette, enhances artistic expression and control.
Understanding these principles, found in watercolour techniques guides, elevates paintings beyond simple colour matching.
Understanding Hue, Value, and Intensity
Hue refers to the pure colour itself – red, blue, green, and so on, defining its position on the colour wheel. It’s the name we give to a colour, its basic identity.
Value, often confused with brightness, describes the lightness or darkness of a colour. A high-value colour is light, approaching white, while a low-value colour is dark, nearing black. Manipulating value creates contrast and form within a watercolour painting, adding depth and dimension.
Intensity (or chroma) represents the purity or saturation of a colour. A highly intense colour is vivid and bright, while a low-intensity colour is dull or muted. Reducing intensity often involves mixing with a complementary colour or adding grey.
These three elements are interconnected; altering one impacts the others. Mastering their interplay, as discussed in watercolour techniques resources, is fundamental to achieving realistic and expressive results. Understanding these concepts, beyond simply matching a hue, is key to successful watercolour painting.
Colour Mixing Basics
Watercolour mixing relies on understanding primary colours – red, yellow, and blue – which, when combined, create secondary colours: orange, green, and violet. Further mixing yields tertiary colours, expanding the palette exponentially.
Transparent pigments are crucial in watercolour; layering allows colours to interact optically, creating luminosity. Avoid overmixing, which can result in “muddy” colours. Instead, layer washes to achieve desired shades.
Complementary colours (opposite on the colour wheel) neutralize each other, reducing intensity. Adding a touch of a colour’s complement can subtly tone it down. Experimentation is key!
Resources on watercolour techniques emphasize starting with a limited palette and gradually expanding it. Online tutorials and forums offer guidance on specific colour combinations and mixing ratios. Remember, colour mixing is both a science and an art, requiring practice and observation.
Creating a Watercolour Palette
Building a watercolour palette begins with selecting a range of pigments. A limited palette – perhaps a warm and cool version of each primary colour (red, yellow, blue) – is ideal for beginners, fostering colour harmony and preventing muddy mixes.
Consider lightfastness ratings when choosing paints; higher ratings indicate greater resistance to fading over time. Dioxazine purple, for example, is a commonly discussed pigment in watercolour forums.
Organize your palette logically, grouping colours by hue and value. This facilitates efficient mixing and allows for quick colour selection during painting sessions. Pans or tubes are both viable options, depending on preference.
Many watercolour tutorials recommend creating colour charts to document your mixes and understand how different pigments interact. Experimentation and personal preference are paramount when crafting a palette suited to your artistic style.
Advanced Watercolour Techniques
Advanced techniques, like masking fluid, salt textures, and splattering, elevate watercolour paintings, adding depth and unique effects.
Watercolour pencils offer another layer of control, while challenges and communities inspire experimentation and skill development.
Exploring these methods expands artistic expression, building upon foundational skills learned through tutorials and practice.
Masking Fluid Techniques
Masking fluid, also known as liquid frisket, is a crucial tool for preserving white areas or intricate details within a watercolour painting. Applying it before washes allows artists to protect specific sections from colour, creating sharp edges and highlights.
The fluid, typically latex-based, is brushed onto the paper and, once dry, acts as a barrier against the paint. After the washes are complete, the masking fluid is gently rubbed away, revealing the protected areas. This technique is particularly useful for rendering complex subjects like foliage, spray, or architectural details.
However, proper application and removal are key. Avoid applying excessively thick layers, as this can damage the paper upon removal. Ensure the masking fluid is fully dry before painting over it, and use a clean, soft rubber cement pick-up or a finger to carefully lift it off, preventing smudging or tearing the paper. Experimentation with different application tools – brushes, ruling pens, or even toothpicks – can yield varied effects.
Online tutorials often demonstrate innovative uses of masking fluid, showcasing its versatility in achieving precise and controlled watercolour results.
Salt Texture Effects
Salt, a readily available household item, offers a surprisingly effective method for creating unique textures in watercolour paintings. When sprinkled onto wet washes, salt absorbs the pigment, resulting in fascinating crystalline patterns as the paint dries.
Different types of salt – coarse sea salt, table salt, or rock salt – produce varying effects. Coarse salt creates larger, more dramatic textures, while finer salt yields a speckled appearance. The timing of application is also crucial; salt applied to very wet washes will create more diffused patterns, whereas applying it to slightly damp washes results in sharper, more defined textures.
Once the paint is completely dry, the salt is simply brushed away, revealing the textured surface beneath. This technique is particularly well-suited for depicting natural elements like snow, sand, or rocky landscapes. Experimentation is encouraged, as the results can be unpredictable and delightfully surprising.
Many watercolour tutorials showcase this simple yet impactful technique, demonstrating its potential for adding depth and visual interest to paintings.
Splattering and Spattering
Splattering and spattering are dynamic watercolour techniques used to introduce texture, energy, and a sense of spontaneity into a painting. While similar, they differ slightly in application. Splattering involves flicking paint from a brush, creating a random distribution of small droplets. Spattering, conversely, often utilizes a toothbrush or stiff brush to generate a more controlled, yet still textured, effect.
Controlling the consistency of the paint is key. Thinner washes splatter more easily, while thicker paint creates larger, more defined spots. Protecting areas of your painting is also important – masking fluid or careful positioning can prevent unwanted splatters.
These techniques are excellent for depicting foliage, stars, or adding a distressed, weathered look to surfaces. Experiment with different brushes, paint consistencies, and distances to achieve a variety of effects. Many watercolour tutorials demonstrate these techniques, offering guidance on achieving desired results.
Embrace the unpredictable nature of splattering and spattering; it’s a fantastic way to add character and life to your watercolour work.
Using Watercolour Pencils
Watercolour pencils offer a unique blend of control and fluidity, bridging the gap between drawing and painting. They allow for detailed work and precise application of colour, which can then be activated with water to create traditional watercolour effects.
There are two primary ways to use them: dry-on-dry and wet-on-dry. Dry-on-dry involves applying the pencil directly to the paper, then blending with a wet brush. Wet-on-dry entails wetting the paper first, then applying the pencil for a more immediate wash effect.
Watercolour pencils are excellent for adding details, layering colours, and creating textures. They’re also versatile – you can even use them in conjunction with traditional watercolour paints. Many watercolour tutorials showcase techniques for achieving different effects, from subtle washes to bold, vibrant hues.
Experiment with varying pressure and water levels to discover the full range of possibilities these versatile tools offer. They are a fantastic addition to any artist’s toolkit.
Troubleshooting Common Watercolour Problems
Watercolour presents unique challenges; buckling paper, muddy colours, and uncontrolled bleeds are frequent issues for artists.
Addressing these requires understanding paper properties, colour mixing, and water control, as discussed in many tutorials.
Forums offer solutions and tips, helping artists overcome obstacles and refine their watercolour techniques.
Preventing Buckling Paper
Buckling, the warping of watercolour paper due to uneven water absorption, is a common frustration for artists. Several techniques can effectively mitigate this issue, ensuring a smoother painting experience and professional-looking results.
Paper Choice: Selecting a heavier weight paper (140lb/300gsm or higher) is crucial. Thicker paper is more resistant to warping. 100% cotton paper is also highly recommended as it handles water beautifully and buckles less than wood pulp papers.
Stretching: Traditionally, watercolour paper is stretched before painting. This involves soaking the paper in water, then securing it to a rigid board using gummed tape. As the paper dries, it shrinks taut, preventing buckling.
Taping: A simpler method involves taping the paper to a board using artist’s tape. Ensure the tape adheres firmly to all four sides, creating a sealed border. This restricts the paper’s movement as it absorbs water.
Paper Blocks: Watercolour blocks, glued on all four sides, are a convenient option. The glue holds the paper flat during painting, and the sheets can be removed once dry.
Understanding these methods, often detailed in watercolour techniques guides and tutorials, empowers artists to control their paper and achieve optimal results.
Fixing Muddy Colours
Muddy colours in watercolour often arise from overmixing paints, leading to a dull, lifeless appearance. Fortunately, several strategies can rescue a painting from this common pitfall, restoring vibrancy and clarity.
Limit Your Palette: Restricting the number of colours used minimizes the potential for unwanted mixtures. Start with a few key hues and build complexity through layering and value changes.
Clean Water & Brushes: Regularly rinse your brush and use clean water. Contaminated water introduces unintended colours, contributing to muddiness. A fresh palette is also essential.
Layering & Glazing: Instead of mixing colours directly on the palette, apply transparent washes (glazes) over previous layers. This allows colours to interact optically, creating depth and richness without becoming muddy.
Lifting Colour: Use a clean, damp brush or a paper towel to lift excess pigment from the paper, revealing underlying layers and correcting unwanted mixtures. This is a powerful technique for rescuing areas.
Exploring these techniques, often found in watercolour techniques resources and tutorials, helps artists achieve clean, luminous watercolour paintings.
Controlling Watercolour Bleeds
Watercolour bleeds, the spreading of pigment on wet paper, are a characteristic – and sometimes frustrating – aspect of the medium. Mastering control over these bleeds is crucial for achieving defined shapes and details.
Paper Choice: Heavier weight watercolour paper (140lb/300gsm or higher) is less prone to buckling and excessive bleeding. The surface texture also influences bleed control; smoother surfaces offer more control.
Water Control: The amount of water on your brush and the paper dictates the extent of the bleed. Use a drier brush for sharper edges and more controlled washes. Tilt the paper to manage water flow.
Layering Technique: Allow each layer to dry completely before applying the next. This prevents colours from running and blending uncontrollably. Patience is key!
Masking Fluid: Employ masking fluid to protect areas you want to keep pristine. Apply it before painting, let it dry, and remove it once the surrounding areas are complete.
Understanding these techniques, often detailed in watercolour techniques guides and tutorials, empowers artists to harness the fluidity of watercolour while maintaining control.
Resources for Learning Watercolour
Online tutorials, watercolour books, and active communities offer invaluable learning opportunities for artists seeking to refine their skills and explore techniques;
Participate in watercolor challenges to boost your skills, and find watercolor tips within dedicated forums for continuous improvement and inspiration.
Online Watercolour Tutorials
Numerous online platforms provide comprehensive watercolour tutorials, catering to all skill levels, from absolute beginners to experienced painters seeking advanced techniques.
These resources often feature step-by-step demonstrations, covering fundamental skills like washes, layering, and colour mixing, alongside more complex methods such as masking fluid application and salt texture effects.
Many artists share their expertise through video tutorials on platforms like YouTube, offering visual guidance and practical tips. Websites dedicated to art instruction also host a wealth of watercolour tutorials, often accompanied by downloadable resources like practice sheets and reference images.
Exploring these tutorials allows artists to learn at their own pace, revisiting concepts as needed and experimenting with different approaches. Forums and online communities frequently share links to helpful tutorials and provide a space for artists to ask questions and receive feedback, fostering a collaborative learning environment.
Don’t hesitate to search for specific techniques or subjects – whether it’s painting landscapes, florals, or portraits – to find tutorials tailored to your interests.
Watercolour Books and Guides
Traditional watercolour books and guides remain invaluable resources for artists, offering in-depth knowledge and structured learning experiences. These publications often delve into the history of watercolour, explore various techniques with detailed explanations, and provide practical exercises for skill development.
Many books focus on specific aspects of watercolour painting, such as colour theory, composition, or particular subjects like landscapes or botanical illustration. They frequently include high-quality illustrations and step-by-step demonstrations, making complex concepts easier to grasp.
Comprehensive guides often cover essential materials, including paints, papers, and brushes, offering advice on selecting the right tools for different projects. Some books even provide downloadable resources, such as practice templates or colour charts, to supplement the learning process.
Exploring a range of watercolour books allows artists to discover different approaches and perspectives, expanding their artistic horizons. These resources provide a solid foundation for developing watercolour skills and fostering a deeper understanding of the medium.
Consider seeking recommendations from experienced watercolourists or browsing online reviews to find books that align with your learning style and interests.
Watercolour Challenges and Communities
Participating in watercolour challenges is a fantastic way to improve skills, explore new techniques, and stay motivated. Online platforms and art communities frequently host monthly or weekly challenges with specific themes or prompts, encouraging artists to step outside their comfort zones.
These challenges often foster a supportive environment where artists can share their work, receive constructive feedback, and learn from others. Online forums, like those mentioned, provide spaces for discussion, troubleshooting, and exchanging tips on watercolour techniques.
Joining watercolour communities, both online and in-person, offers opportunities to connect with fellow enthusiasts, attend workshops, and participate in group exhibitions. The December 2025 and July 2025 challenges demonstrate active engagement.
Sharing your work and receiving critiques can accelerate your learning process and help you identify areas for improvement. Engaging with a community provides inspiration, encouragement, and a sense of belonging.
Don’t hesitate to explore various online groups and local art organizations to find a watercolour community that suits your needs and interests.