Singer Heavy Duty 4411 Sewing Machine Manual: A Comprehensive Guide
This guide provides detailed instructions for the Singer Heavy Duty 4411, covering setup, operation, maintenance, and troubleshooting for optimal sewing performance.
The Singer Heavy Duty 4411 is a popular sewing machine renowned for its durability and ability to handle a wide range of fabrics, from lightweight silks to heavy-duty denim. This machine is designed for both beginners and experienced sewers seeking a reliable and powerful tool.
Its robust construction and powerful motor make it ideal for frequent use and tackling challenging projects. The 4411 boasts 11 built-in stitches, offering versatility for various sewing applications.
This manual serves as a comprehensive resource, guiding you through every aspect of using your Singer 4411, from initial setup and threading to advanced techniques and routine maintenance. Understanding its features will unlock its full potential, ensuring years of successful sewing.

Key Features and Benefits
The Singer Heavy Duty 4411 excels with its 1,500 stitches per minute speed, significantly faster than many standard machines. Its heavy-duty metal frame ensures stability and longevity, even with demanding projects. The free arm functionality simplifies sewing cuffs, collars, and other cylindrical shapes.
Benefit from 11 built-in stitches, including options for basic sewing, zigzag, and decorative applications. Adjustable stitch length and width provide customization for diverse fabric types and desired finishes.
This machine is exceptionally user-friendly, making it suitable for beginners, while its power and features appeal to seasoned sewers. Reliable performance and ease of maintenance contribute to a satisfying sewing experience, delivering professional-quality results.
Understanding the Machine Components
This section details the Singer 4411’s parts, including the exterior layout and internal mechanisms, for a thorough understanding of its functionality.
Machine Overview: Front and Back Views
The Singer Heavy Duty 4411 presents a robust design, easily identifiable by its front and rear features. From the front, you’ll notice the stitch selection dial, the needle clamp, presser foot, and feed dogs – crucial for fabric manipulation. The bobbin winder is prominently positioned on the top.
Turning to the back, observe the handwheel for manual control, the power switch, and access points for internal maintenance. The machine’s sturdy construction is evident in both views. Understanding these external components is fundamental before proceeding with threading or operation. The free arm extends from the front, facilitating cuff and sleeve work. Familiarizing yourself with these views will streamline your sewing experience and aid in troubleshooting.
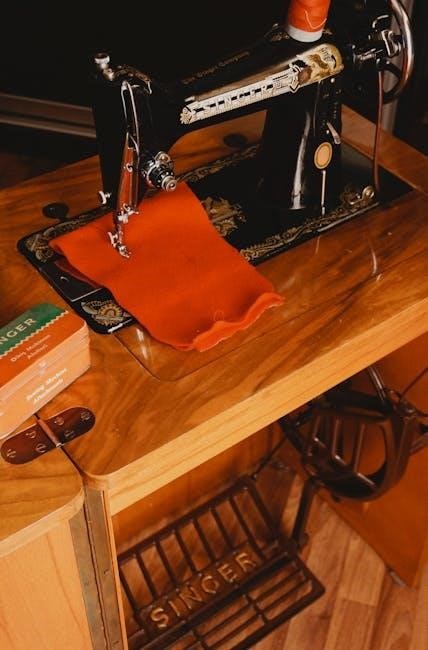
Identifying Key Parts: Spool Pin, Bobbin Winder, Handwheel
The spool pin, located on top of the machine, securely holds the thread spool, ensuring smooth feeding. The bobbin winder, positioned nearby, winds thread onto the bobbin – essential for creating the lower stitch. Correct bobbin winding is vital for stitch quality.
The handwheel, found on the right side, allows manual control of the needle. Turning it raises and lowers the needle, useful for precise positioning or when power isn’t available. These three components work in harmony. Understanding their function and proper usage is crucial for successful sewing with the Singer Heavy Duty 4411. Regular checks ensure optimal performance.
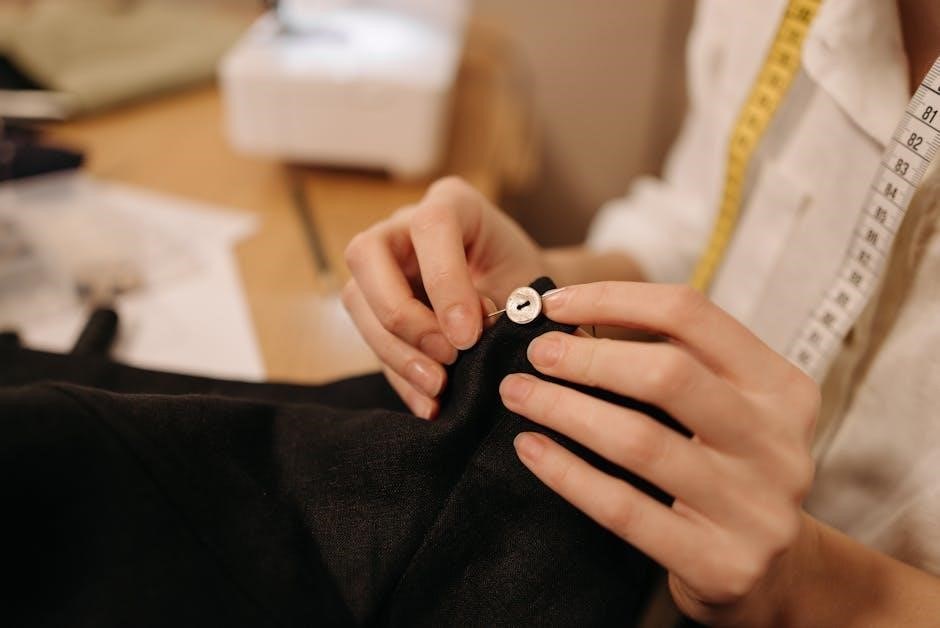
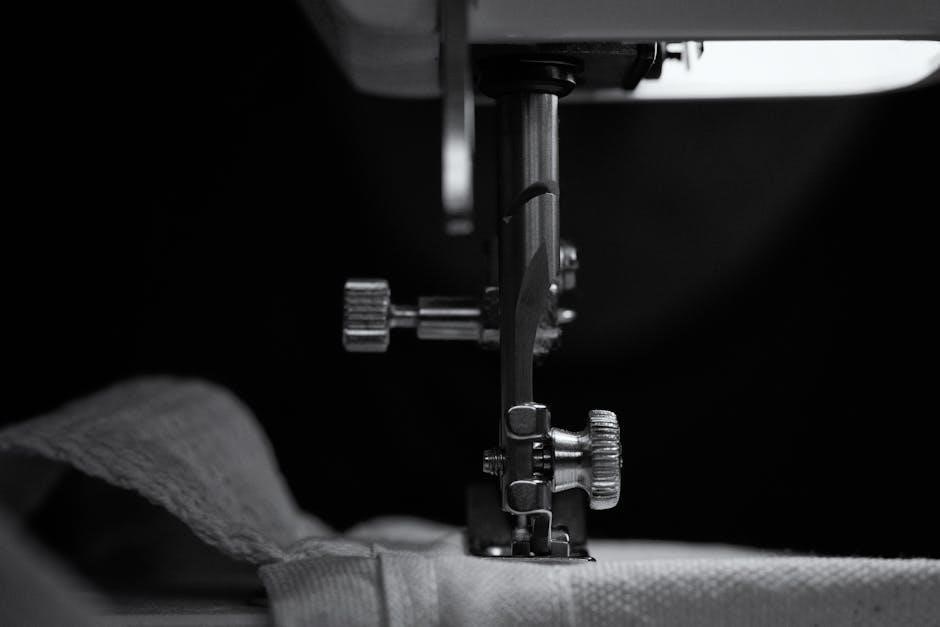
Needle and Presser Foot Mechanisms
The needle mechanism drives the needle up and down, creating stitches. Proper needle selection – size and type – is critical for different fabrics. The presser foot mechanism holds the fabric firmly against the feed dogs, ensuring even feeding. Adjusting presser foot pressure is vital for varied materials.
Understanding how these systems interact is key to achieving consistent stitch quality. The presser foot lifts and lowers, allowing fabric placement and removal. Maintaining both mechanisms – cleaning lint and ensuring smooth movement – prevents issues like skipped stitches or fabric bunching. Regular inspection and care are essential for reliable operation.
Setting Up Your Singer 4411
Proper setup involves winding the bobbin, threading both upper and lower threads, and correctly inserting the bobbin for smooth, efficient sewing operation.
Winding the Bobbin
Begin by placing the thread spool on the spool pin. Guide the thread through the thread guides, ensuring it’s properly seated. Next, thread the end of the thread through the bobbin winder tension disc.
Place the empty bobbin onto the bobbin winder spindle, pressing it down firmly. Push the bobbin winder spindle to the right to engage it. Hold the thread tail firmly as you begin winding by gently pressing the foot pedal.
Allow the machine to wind several rotations before releasing the foot pedal. Once the bobbin is full, the bobbin winder will automatically stop. Cut the thread and remove the bobbin. Always ensure even winding for optimal performance.
Threading the Upper Thread
Start by raising the presser foot; this opens the tension discs. Place the spool of thread on the spool pin. Guide the thread through the first thread guide, then down and around the tension discs.
Continue threading upwards through the take-up lever, ensuring the thread is securely seated. Next, thread the thread through the guide on the needle clamp. Finally, thread the needle from front to back.
Pull several inches of thread through the needle eye. Lower the presser foot and gently pull the thread to confirm proper threading. Incorrect threading can cause tension issues and skipped stitches.
Inserting the Bobbin
First, ensure the machine is turned off. Locate the bobbin case on the front of the machine. Gently pull the bobbin case latch open. Insert the pre-wound bobbin into the bobbin case, ensuring the thread unwinds in the correct direction – typically counter-clockwise.
Guide the thread through the tension spring on the bobbin case. Then, re-insert the bobbin case back into the machine until it clicks securely into place. Gently pull on the thread tail to confirm it’s properly engaged with the tension mechanism.
Proper bobbin insertion is crucial for balanced stitch formation. Incorrect insertion can lead to looping or uneven stitches.
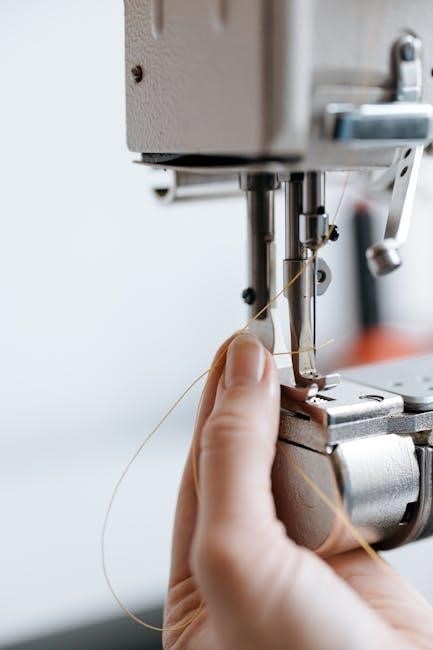
Threading the Needle
Begin by raising the presser foot; this opens the tension discs. Guide the upper thread from the spool, through the first thread guide, and then down and around the tension disc. Continue threading through the take-up lever, ensuring the thread is securely seated within the lever’s hook.
Next, thread the needle clamp from back to front. Finally, insert the thread through the eye of the needle. A needle threader can be helpful for easier threading. Pull several inches of thread through the needle eye.
Always ensure the presser foot is up during threading to allow proper tension. Incorrect threading can cause skipped stitches or thread breakage.
Basic Sewing Operations
Mastering fundamental techniques like stitch selection, length/width adjustments, and straight/zigzag stitching unlocks the Singer 4411’s full potential for diverse projects.
Selecting Stitches
The Singer Heavy Duty 4411 boasts 32 built-in stitches, offering versatility for various sewing applications. To select a stitch, use the stitch selection dial located on the front of the machine. This dial allows you to easily browse and choose from a range of options, including straight stitches, zigzag stitches, decorative stitches, and buttonhole stitches.
Each stitch is clearly numbered and illustrated on the machine, making it simple to identify the desired pattern. Refer to the stitch guide printed on the machine or in the manual to understand the specific purpose and recommended settings for each stitch. Experimenting with different stitches can enhance your projects and add creative flair. Remember to adjust the stitch length and width according to the fabric type and desired effect.
Adjusting Stitch Length and Width
Fine-tuning your stitches is crucial for achieving professional results. The Singer Heavy Duty 4411 allows precise control over stitch length and width using dedicated dials. The stitch length dial, typically marked with numbers, determines the distance between each stitch. Shorter stitch lengths are ideal for delicate fabrics and intricate details, while longer lengths are suitable for heavier materials and quicker sewing.
The stitch width dial controls the side-to-side deviation of stitches, primarily affecting zigzag and decorative patterns. Wider widths create bolder designs, while narrower widths offer more subtle effects. Always test your stitch settings on a scrap fabric before starting your project to ensure the desired appearance and prevent puckering or thread breakage.
Straight Stitching Techniques
Mastering the straight stitch is fundamental to sewing. Begin by selecting the straight stitch option on your Singer 4411. Ensure your fabric is aligned with the presser foot’s guide markings for a consistent seam allowance. Maintain a steady, moderate speed, allowing the machine to feed the fabric evenly. Avoid pulling or pushing the material, as this can distort the stitch.
For accurate seam lines, use the edge of the presser foot as a guide or attach a seam guide. Practice maintaining a consistent distance from the fabric edge. Backstitch at the beginning and end of each seam to secure the stitches and prevent unraveling. Regularly check the stitch quality and adjust tension if needed for a clean, professional finish.
Zigzag Stitching Applications
The zigzag stitch on your Singer 4411 offers versatility beyond basic seams. Utilize it for finishing raw edges to prevent fraying, creating decorative embellishments, and sewing stretch fabrics. Adjust the stitch width to control the zigzag’s breadth; wider stitches are ideal for stretch, while narrower ones suit edge finishing.
Explore its use in appliqué, securing elastic, and creating buttonholes (though a dedicated buttonhole foot is recommended). Experiment with varying stitch lengths for different effects. Remember to test on scrap fabric first to determine the optimal settings for your material. Zigzag stitching provides a durable and flexible seam, perfect for garments and projects requiring give.
Advanced Sewing Techniques
Unlock your Singer 4411’s full potential with techniques like free arm sewing, diverse fabric handling, buttonhole creation, and professional zipper insertion.
Using the Free Arm
The Singer Heavy Duty 4411 boasts a convenient free arm feature, significantly simplifying the sewing of cylindrical items. To utilize this, detach the extension table by releasing the latch. This creates a horseshoe-shaped opening, allowing you to maneuver sleeves, pant legs, collars, and other similarly shaped pieces with ease.
Position the fabric so the area needing stitching is over the free arm opening. Slowly rotate the fabric while guiding it under the needle. This provides greater control and precision compared to sewing flat. Remember to adjust your stitch length appropriately for the fabric type and desired finish. The free arm is particularly useful for curves and tighter spaces, offering a professional result.
Practice with scrap fabric first to become comfortable with the technique. Ensure adequate lighting and maintain a steady hand for optimal results.
Sewing Different Fabric Types (Denim, Cotton, Silk)
The Singer Heavy Duty 4411 excels at handling diverse fabrics, but adjustments are crucial for optimal results. For denim, use a heavier needle (size 16 or 18) and a longer stitch length (3.0-3.5mm). Cotton generally works well with a universal needle (size 80/12) and a medium stitch length (2.5mm).
Delicate fabrics like silk require a fine needle (size 60/8) and a shorter stitch length (2.0mm or less). Reduce presser foot pressure to prevent fabric distortion. Always test on a scrap piece first! Adjust thread tension accordingly; heavier fabrics need higher tension, while lighter fabrics need lower tension.
Consider using a walking foot for slippery or multiple layers to ensure even feeding. Slow down your sewing speed for greater control and accuracy.
Buttonhole Sewing
The Singer Heavy Duty 4411 features a one-step buttonhole function, simplifying this process. Begin by selecting the buttonhole stitch on your machine. Attach the buttonhole foot. Position your fabric, ensuring the buttonhole placement is accurate.
Carefully lower the presser foot and begin sewing; the machine automatically creates the buttonhole outline. Stop when complete. For best results, use a stabilizer on thinner fabrics. Measure your button and select the corresponding buttonhole size on the machine before sewing.
Practice on scrap fabric first to familiarize yourself with the process. Always test the buttonhole with the actual button to ensure a proper fit.
Zipper Insertion
Inserting a zipper with the Singer Heavy Duty 4411 requires a zipper foot. Attach the appropriate foot – it can be positioned to the left or right for close stitching. Place the zipper face down, aligning it with the fabric edge. Begin stitching close to the zipper teeth, using a straight stitch.
Slowly guide the fabric under the presser foot, keeping the zipper teeth aligned. Stop frequently to ensure the stitching remains even. Once one side is complete, repeat the process on the other side of the zipper.
Practice on scrap fabric to master the technique. A walking foot can be helpful for slippery fabrics.
Maintenance and Troubleshooting
Regular cleaning and oiling are crucial for the Singer 4411’s longevity. Address common issues like thread breakage or skipped stitches promptly for smooth operation.
Cleaning the Machine
Maintaining a clean Singer 4411 is vital for consistent performance and preventing mechanical issues. Always unplug the machine before cleaning! Begin by removing the needle and presser foot. Use a brush (often included with the machine) to remove lint and dust from the bobbin area, feed dogs, and around the needle plate.
For more thorough cleaning, a small vacuum cleaner with a brush attachment can be used to carefully remove debris from hard-to-reach areas. A lint brush or a piece of cloth dampened (not soaked!) with sewing machine oil can also be used to wipe down exterior surfaces. Never use water or solvents, as these can damage the machine’s internal components. Regular cleaning, even after each use, will significantly extend the life of your Singer Heavy Duty 4411.
Oiling the Machine
Proper lubrication ensures smooth operation of your Singer Heavy Duty 4411. Always use sewing machine oil – never oil substitutes! Locate the oiling points as indicated in your manual; typically, these include the bobbin race, hook assembly, and any areas where metal parts move against each other.
Apply a small drop of oil to each point, and then operate the machine slowly by hand (using the handwheel) to distribute the oil evenly. Avoid over-oiling, as excess oil can attract lint and cause problems. Wipe away any excess oil with a clean cloth. Regular oiling, approximately every few hours of use, will keep your machine running efficiently and prevent wear and tear. Consistent maintenance extends the lifespan of your Singer.
Troubleshooting Common Problems (Thread Breakage, Skipped Stitches)
Thread breakage often stems from incorrect threading, a dull needle, or improper tension. Re-thread the machine carefully, ensuring the thread is seated correctly in all guides. Replace the needle with a new one of the correct size and type for your fabric. Adjust the upper tension dial – start with the default setting and make small adjustments.
Skipped stitches can indicate a bent or damaged needle, incorrect needle insertion, or issues with the timing. Always insert the needle with the flat side facing the back. Check the bobbin case for lint or debris. If problems persist, consult the manual for detailed troubleshooting steps or contact Singer customer support.
Replacing the Needle
To replace the needle, always ensure the machine is turned off and unplugged. Loosen the needle clamp screw using the screwdriver included with your Singer 4411. Gently pull the old needle downwards and discard it safely – needles are sharp! Insert the new needle with the flat side facing the back of the machine.
Ensure the needle is pushed up as far as it will go into the needle clamp. Tighten the needle clamp screw securely, but do not overtighten. Using the correct needle type and size for your fabric is crucial for optimal sewing performance and preventing damage to the machine. Refer to the manual for needle recommendations.
Safety Precautions
Always prioritize safety when operating the Singer 4411. Follow all instructions, avoid needle injuries, and ensure electrical safety for worry-free sewing.
General Safety Guidelines
Before operating your Singer Heavy Duty 4411, carefully read the entire instruction manual. This ensures a thorough understanding of safe operation and prevents potential hazards. Always disconnect the machine from the power source before changing the needle, threading, cleaning, or performing any maintenance.
Never pull or push the fabric while sewing; let the machine feed the fabric naturally. Keep fingers away from the needle area during operation to avoid accidental needle injuries. Do not use the machine if it is damaged or malfunctioning. Inspect the power cord regularly for any signs of damage and replace it if necessary.
Supervise children closely when the machine is in use or stored nearby. This sewing machine is intended for household use only; avoid using it for industrial purposes. Always use the correct accessories and attachments recommended by Singer.
Electrical Safety
To ensure electrical safety with your Singer Heavy Duty 4411, always operate it on a properly grounded electrical outlet of the correct voltage. Never operate the machine with a damaged power cord or plug. If the cord is damaged, it must be replaced by a qualified technician.
Avoid using extension cords whenever possible. If an extension cord is necessary, ensure it is heavy-duty and rated to handle the machine’s power requirements. Do not immerse the machine, power cord, or plug in water or other liquids.
Always unplug the machine from the electrical outlet when not in use, before cleaning, or before performing any maintenance. Never attempt to repair the machine yourself; contact a qualified service technician for repairs; Keep the machine away from heat sources and flammable materials.
Avoiding Needle Injuries
Protecting your fingers is paramount when using the Singer Heavy Duty 4411. Always keep fingers away from the needle area while the machine is running. Never sew over pins; remove them before the needle reaches them. Use the needle guard when not actively sewing, especially during threading or bobbin changes.
Exercise caution when changing needles. Turn off and unplug the machine before attempting a needle replacement. Dispose of broken needles carefully to prevent accidental injuries. Never touch the needle plate while the machine is in operation.
Maintain a safe sewing environment and focus on the task at hand. Avoid distractions that could lead to accidental contact with the needle. If a needle breaks, stop the machine immediately and carefully remove the broken pieces.
Accessing the Manual and Support
Find the official Singer 4411 manual online as a free PDF download, alongside FAQs and direct contact information for Singer customer support.
Downloading the Official Singer 4411 Manual (PDF)
Accessing the comprehensive Singer Heavy Duty 4411 manual in PDF format is straightforward. Numerous websites offer a free download of the 63-page document, providing detailed guidance on all aspects of the machine.
This includes setup instructions, stitch guides, maintenance schedules, and troubleshooting tips. Searching online for “Singer 4411 manual PDF” will yield several reliable sources. Ensure the downloaded file is legitimate and free from malware.
The official manual covers essential safety precautions, component identification, and step-by-step instructions for various sewing techniques. Having a digital copy readily available allows for quick reference during projects and simplifies machine upkeep. It’s a valuable resource for both beginner and experienced sewers.
Frequently Asked Questions (FAQ)
Many users commonly inquire about threading issues, particularly the upper thread and bobbin winding. Another frequent question concerns stitch problems like skipped stitches or thread breakage, often linked to incorrect needle insertion or tension settings.
Troubleshooting fabric feeding difficulties and understanding the various presser feet applications are also popular topics. Users often ask about the machine’s compatibility with different fabric types, such as denim or silk.
Furthermore, questions arise regarding maintenance, like oiling procedures and cleaning frequency. Currently, the Singer 4411 has 5 FAQs documented online, with 6 user comments offering additional insights and solutions. These resources provide quick answers to common concerns.
Singer Customer Support Contact Information
For direct assistance with your Singer Heavy Duty 4411, visit the official SINGER website. There, you’ll find a comprehensive support section with troubleshooting guides and FAQs. You can also access live chat support during business hours for immediate help with operational issues.
Alternatively, you can reach Singer customer service via phone. Their dedicated team is equipped to address concerns regarding machine functionality, parts replacement, and warranty claims. Detailed contact numbers are available on the SINGER website, categorized by region.
Additionally, explore the online community forums where users share tips and solutions. These platforms offer peer-to-peer support and valuable insights into maximizing your sewing experience.